
8 Easy Tips for Taking Photos of Your Feathered Friend
What is the best way to photograph birds? You don't have to go to school for photography or have a fancy, expensive camera to capture beautiful pictures of your bird. Many smartphones have excellent cameras, making it possible for nearly anyone to take great snapshots. Pete Laskie is the Senior Creative Lead for Great Companions and shares some simple photography tips so you can impress your friends with fantastic photos of your feathered friend.
- Lighting: If possible, natural outdoor lighting is the best. But before taking your bird outside, make sure you have steps in place to keep your feathered friend safe, like a flight harness. Once outside pay attention to the position of the sun. The sun is a great natural light, but it can also make your subject look like a dark shadow. If you start taking pictures and look at them and realize your subject looks dark, try switching places to make the sun work for you. If outdoor lighting isn't possible, make sure your bird is in a well-lit room but not right in front of a bright window, otherwise your bird might look like a black shadow. "I would avoid bright sunny days where the shadows are too harsh. Cloudy days are great, where the sunlight gets diffused by the clouds and softens the light. Use a tall tree to diffuse light but not to where it really casts a shadow on your bird. Or use the light from a large window. Don't shoot towards the window – shoot with the light more behind you where it lights the bird," Pete says.
- Background: You want your photo to highlight your awesome bird… not the items around your bird. Before snapping the photo take a quick glance around the area where your bird will be photographed and make sure there isn't clutter or anything else you don't want to appear in the picture. Make sure the background isn't too distracting or busy or colorful where it takes away from your bird. Let your bird be the star.
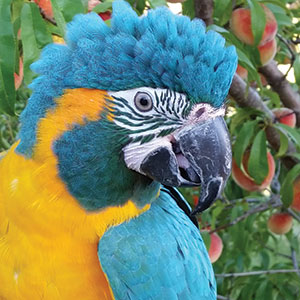
- Focus: Make sure to focus on the main subject of the photo. Usually it's good to make sure the eyes are in focus, especially if you are in tight on your bird's head. Sometimes if you are in tight the focus might tend to be on the beak, as that is closer to you. This can cause the bird's eyes to be blurry.
- Still vs. Action Shot: Capturing a good, clear action shot is tricky, so if possible try to have your subject hold still. This will eliminate blurry or out-of-focus pictures. Trust us, we understand that getting a bird to hold still can sometimes be tricky. One trick is to give your bird a treat of her favorite peanuts to catch her attention while quickly snapping a shot or two.
- Alignment: Your bird is the focus of this picture so make sure he or she is the main subject in the picture. A good rule of thumb, before taking the picture, imagine drawing an imaginary "X" across your camera screen. The center of the "X" should be the main part of your bird that you are trying to capture. For example, if it's a picture of your bird's head, their beak should be near the center of the X. If it's a full body shot you're going for, your bird's belly should be at the center of the picture.
- Take Multiple Shots: Most modern digital cameras allow us the ability to instantly look at the picture we took. So don't be afraid to snap three or four of the same shot right in a row, then go back immediately and take a look at what the picture looks like. Even a micro-second between shots can make the difference between a blurry picture and a brilliant one.
- Review: Along the lines of tip number six, once you've taken the picture go back right away and take a look at what it looks like. Take a close look to see if the shot is in focus. Maybe after you look at the picture you realize there is something in the background that you'd rather not have the whole world see. Reviewing the photo will also allow you to make sure the lighting is okay. You don't want your bird to look too dark or too bright. Then if you realize the picture could be better, you can easily snap a few more, while you and your bird are in "photo shoot mode."
- Only Share the Best: If you've followed tip number six and took multiple shots, pick the top one or two to share on Facebook or Instagram. (Use #LoveYourBird when you post!) Posting on social media is a great way to get feedback from your friends and other bird peeps on your bird's portfolio.
Now that you have the tools to capture great pictures of your bird, we want to see your photos! Make sure to follow Great Companions on Facebook and Instagram and when you post a picture tag us with #loveyourbird.
Discover More!
Taking Your Bird OutsideBird Feather Health and Anatomy
How to Clean a Bird Cage
Return to Bird Articles
